1.Understanding Stucco Walls and Their Challenges
Before diving into the quick and safe TV mounting process, it’s crucial to grasp the unique properties and challenges that stucco walls present for installations.
Stucco is a popular exterior finish known for its durability and aesthetic appeal. Composed of cement, sand, and lime, it forms a hard, textured surface when applied to walls. While stucco is an excellent choice for many homes, its dense and uneven nature can pose challenges when it comes to mounting items such as TVs.
One of the primary challenges stems from the stucco’s composition. Its hardness can make it difficult to penetrate, requiring specialized tools and techniques for successful installations. Additionally, the uneven texture of stucco surfaces can affect the stability and alignment of mounted objects.
To overcome these challenges and ensure a secure TV mounting experience, consider the following steps:
- Assess the Stucco Surface: Begin by thoroughly examining the stucco surface where you plan to mount the TV. Take note of any irregularities, such as high or low spots, and be prepared to adjust your mounting strategy accordingly.
- Use the Right Anchors: Traditional anchors may not be sufficient for stucco walls. Opt for anchors specifically designed for stucco, such as masonry anchors or screw anchors. These anchors are designed to provide better grip and stability in the dense stucco material.
- Pre-Drill Holes: Due to the stucco’s hardness, pre-drilling holes is a crucial step in the mounting process. Use a masonry drill bit to create pilot holes for the anchors. Be cautious and patient during this step to prevent any damage to the stucco surface.
- Select Appropriate Screws: Choose screws that are suitable for stucco installations. Coated screws designed for masonry applications offer better resistance to corrosion and ensure a more secure attachment.
- Consider Professional Installation: If you’re unsure about tackling the TV mounting on stucco walls yourself, consider hiring a professional installer. Experienced installers have the expertise and equipment to handle the challenges posed by stucco, providing a safe and secure mounting solution.
- Mind the Weight Capacity: Ensure that the chosen mounting bracket and anchors can support the weight of your TV. Stucco walls may require additional support, so be mindful of the specifications provided by both the TV manufacturer and the mounting hardware.
- Adjust for Wiring and Outlets: Before finalizing the installation, consider the placement of wiring and electrical outlets. Ensure that the mounting location allows for easy and safe access to power sources without compromising the aesthetics of the setup.
By understanding the unique characteristics of stucco walls and following these steps, you can confidently proceed with a TV mounting project. While stucco presents its challenges, the right tools and techniques can lead to a secure and visually pleasing installation that enhances your home entertainment experience.
1.1 Characteristics of Stucco Walls
1.2 Challenges Faced When Mounting on Stucco Walls
1.3 Assessing the Wall’s Suitability for TV Mounting
2.Preparations for Swift and Secure Installation
To ensure a seamless and secure TV mounting experience, it’s crucial to undertake thorough preparations before diving into the installation process. This chapter will guide you through the necessary pre-installation steps and help you gather the right tools for the task at hand.
Begin by assessing the wall where you plan to mount your TV. Ensure it is structurally sound and can support the weight of the TV and the mounting hardware. If the wall is made of drywall, locate the studs using a stud finder. Mark the stud locations, as these will be the optimal points for securing the mount.
Once you’ve identified the mounting location, clear the area of any obstructions. Remove furniture, decorations, or any items that might hinder the installation process. Creating a clean and spacious work environment not only facilitates the installation but also ensures safety during the mounting process.
Next, carefully unpack the TV mount and all accompanying components. Familiarize yourself with the various parts, including brackets, screws, and any additional hardware. Refer to the included instructions to confirm that all necessary components are present and accounted for. Having a clear understanding of the components will make the installation process more efficient.
Before proceeding, double-check the compatibility of the TV mount with your television. Verify that the mount is designed to support the size and weight of your TV. Consult the TV’s user manual for information on its VESA (Video Electronics Standards Association) mounting pattern, which indicates the distance between the mounting holes on the back of the TV. Ensure that the TV mount is compatible with this pattern.
Now, gather the essential tools for the installation. The exact tools required may vary depending on the TV mount and wall type, but common tools include a power drill, screwdriver, level, measuring tape, and a wrench. Having the right tools on hand will streamline the installation process and contribute to the overall stability of the mounted TV.
Once you’ve assembled your tools, mark the desired height for the TV on the wall. Use a level to ensure accuracy and precision in positioning. Consider the optimal viewing height, taking into account factors such as eye level when seated. Marking the position before drilling will guide you during the mounting process and help achieve the desired aesthetic.
With the wall marked and tools ready, proceed to install the TV mount brackets onto the back of the television. Follow the manufacturer’s instructions closely to ensure proper attachment. Pay attention to weight distribution and make sure the brackets are securely fastened to the TV.
Now, position the TV mount on the wall, aligning it with the marked points. Using the power drill, secure the mount to the wall by drilling into the previously identified studs. If the wall is made of a different material, use appropriate anchors to ensure a secure attachment.
Once the TV mount is firmly in place, carefully lift the TV and align it with the mounted brackets. Ensure a snug fit, securing the TV to the mount according to the manufacturer’s instructions. Use the level to confirm that the TV is perfectly horizontal.
Finally, tidy up the installation area by concealing cables and wires. Use cable management solutions to organize and secure the cords, creating a clean and polished look. This not only enhances the aesthetics of the mounted TV but also minimizes potential tripping hazards.
2.1 Preparing the Stucco Surface for Mounting
2.2 Essential Tools and Materials Needed
2.3 Safety Precautions to Follow
3.Swift and Efficient Steps for Mounting TV on Stucco Walls
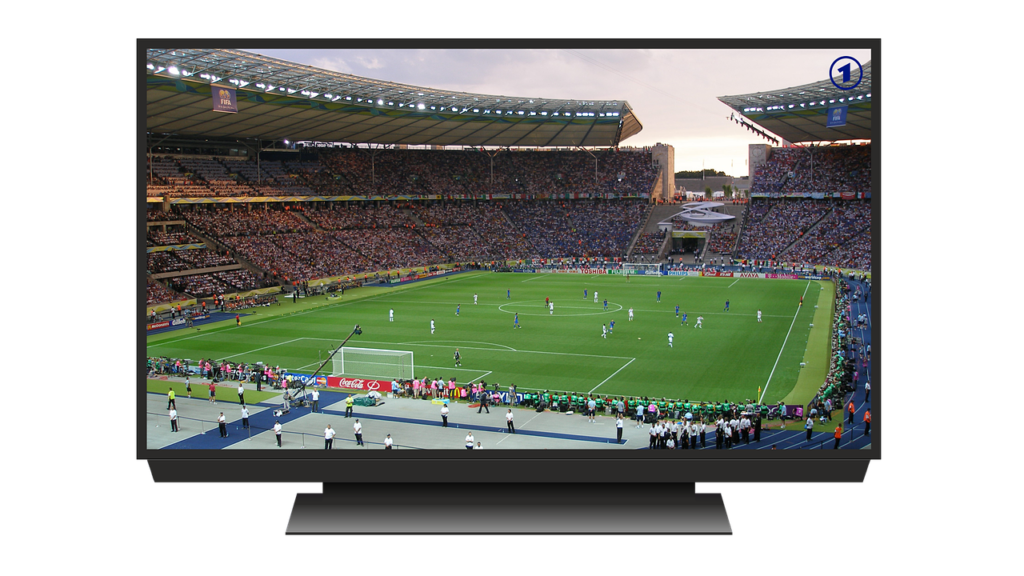
Mounting a TV on stucco walls may seem daunting, but with the right approach, it becomes a swift and efficient task. Follow these steps to achieve a secure installation in just minutes, guaranteeing both safety and durability.
Start by gathering the necessary tools: a stud finder, a drill with masonry bits, wall anchors, screws, a level, and a screwdriver. Having these items ready will streamline the process.
Begin by using the stud finder to locate the studs in the stucco wall. Mark the stud locations with a pencil. This step is crucial as it ensures that your TV mount is anchored to a solid structure, providing the necessary support.
Once you’ve identified the studs, use the drill with masonry bits to make pilot holes where you marked the stud locations. Be sure to choose the appropriate bit size for the wall anchors you’ll be using. This step prepares the wall for the anchors, making the installation more secure.
Insert the wall anchors into the pilot holes. These anchors provide stability by gripping the stucco and the underlying studs. Gently tap them into place with a hammer if needed. Ensure they are flush with the wall surface for a neat and secure fit.
Now, position the TV mount over the anchor locations. Line up the mounting holes on the TV mount with the anchors. Use the drill to secure the mount to the stucco wall by driving screws through the mount and into the anchors. Take care not to overtighten the screws, as this could damage the stucco.
With the TV mount securely attached, use a level to ensure it is perfectly horizontal. Adjust the mount as needed to achieve a level position. This step is crucial for the TV’s stability and aesthetics.
Once the mount is level, it’s time to attach the TV. Most mounts have a simple hook-and-lock mechanism. Lift the Mount TV carefully, aligning the hooks on the back with the mounting bracket on the wall. Once in place, lock the TV onto the bracket according to the manufacturer’s instructions.
Double-check the security of the TV by gently pulling on it from different angles. If it feels stable and doesn’t shift, your installation is successful. If any adjustments are necessary, revisit the leveling and mounting steps.
Finish the installation by organizing and securing the cables. Use cable ties or clips to bundle and conceal the cords, creating a clean and tidy appearance. This not only enhances the aesthetic appeal but also prevents tripping hazards.
3.1 Marking and Measuring for Precision
3.2 Drilling Techniques for Stucco Walls
3.3 Installing Anchors for Stability
3.4 Attaching the TV Mounting Bracket
3.5 Safely Securing the TV in Place
4.Troubleshooting and Quick Fixes
In the world of technology, where advancements move at the speed of light, encountering issues during installations is not uncommon. Whether it’s a software glitch or a hiccup in the hardware, troubleshooting becomes an integral part of the user experience. This chapter aims to guide you through common problems that may arise during installations and offers quick fixes to ensure a seamless process.
It’s not uncommon to encounter issues even with the most rapid installation processes. One of the first things to check is your internet connection. A stable and reliable connection is crucial for downloading and installing software updates. If your connection is spotty or slow, it might lead to incomplete installations or errors during the process. Ensure that your Wi-Fi or Ethernet connection is stable before proceeding with the installation.
Another common issue revolves around compatibility. Sometimes, software may not be compatible with your operating system or device specifications. Before initiating the installation, double-check the system requirements for the software. Ensure that your device meets or exceeds the specified criteria. If not, consider upgrading your system or looking for an alternative software version that aligns with your device specifications.
Occasionally, the installation process may be interrupted due to antivirus or firewall settings. Security software often identifies installation processes as potential threats, leading to interruptions. Temporarily disable your antivirus or firewall during the installation and re-enable it once the process is complete. Remember to exercise caution and only disable these security features temporarily to avoid leaving your system vulnerable.
Corrupted files can also pose a challenge during installations. If you encounter error messages indicating corrupted files, it’s advisable to redownload the installation files from the official source. Ensure that the files are intact before initiating the installation. This simple step can save you from hours of troubleshooting and frustration.
For those using physical installation media such as CDs or DVDs, scratches or damages to the disk can lead to installation errors. Carefully inspect the installation media for any visible damage. If present, consider obtaining a replacement disk to ensure a smooth installation process. Additionally, keep your installation media in a secure and dust-free environment to prevent potential damage.
Sometimes, issues may arise due to conflicting programs or background processes. Before initiating the installation, close unnecessary applications and disable non-essential background processes. This ensures that the installation process has exclusive access to the system resources, minimizing the chances of conflicts.
If you find yourself stuck in an installation loop or facing recurring errors, consider reaching out to the software’s official support channels. Most software developers offer online support forums, chat services, or dedicated customer support lines. They can provide tailored assistance based on the specific issues you’re encountering and guide you through the resolution process.
4.1 Addressing Installation Challenges
4.2 Quick Solutions for Unexpected Hiccups
5.Safety Checks and Post-Installation Care
After completing the swift mounting process of your hand tools in your home workshop, the next critical step involves safety checks and post-installation care. This phase is paramount to not only ensure your well-being but also to guarantee the longevity of your setup. Let’s delve into the details of safety checks and maintenance tips.
Safety Checks:
- Stability Assurance: Begin by verifying the stability of your mounted tools. Make sure they are securely fastened to the designated areas, minimizing the risk of accidental falls or displacement during usage.
- Secure Fixtures: Check that all fixtures, such as brackets and hooks, are tightly secured. Any loose fixtures could compromise the stability of your tools and pose potential hazards.
- Clear Pathways: Ensure that the pathways around your mounted tools are clear. This prevents any tripping hazards and allows for safe movement while working in your home workshop.
- Proper Tool Alignment: Confirm that each tool is correctly aligned and positioned. Misalignment can affect functionality and, in some cases, lead to unsafe operation.
Maintenance Tips:
- Regular Inspections: Schedule routine inspections of your tools and their mounting fixtures. This helps identify any wear and tear early on, allowing for timely repairs or replacements.
- Cleaning Regimen: Keep your tools clean from dust, debris, and any other contaminants. Regular cleaning not only enhances their appearance but also ensures optimal performance.
- Lubrication: Apply lubricants to moving parts as recommended by the manufacturer. This minimizes friction, reduces wear, and contributes to the overall efficiency of your tools.
- Storage Considerations: When not in use, store your tools in designated spaces or toolboxes. This protects them from environmental factors and prevents unnecessary wear.
- Temperature and Humidity Control: Maintain a stable environment in your workshop by controlling temperature and humidity. Extreme conditions can adversely affect the performance and lifespan of your tools.
- Tool-Specific Care: Different tools may require specific care. Refer to the user manuals or manufacturer guidelines for tool-specific maintenance tips. This ensures you address the unique needs of each tool.
- Replacement of Worn Parts: If any parts show signs of wear or damage during inspections, promptly replace them. Using tools with compromised components can lead to accidents and decreased efficiency.
- User Education: Educate yourself on the proper usage and maintenance of each tool. Understanding how to use and care for your tools correctly is essential for both safety and longevity.
By incorporating these safety checks and maintenance tips into your routine, you not only create a secure working environment but also extend the lifespan of your hand tools. Remember, a well-maintained workshop is not only efficient but also a joy to work in, allowing you to unleash your creativity with confidence.
5.1 Checking for Stability and Security
5.2 Maintenance Tips for Longevity
5.3 Ensuring Safety Measures Are in Place
6.Conclusion: Swift and Safe TV Mounting on Stucco Walls
In conclusion, achieving a swift and secure TV mounting on stucco walls is well within reach with the proper knowledge and techniques. This guide provides comprehensive steps to ensure both efficiency and safety.
To begin with, it’s crucial to gather all the necessary tools and materials before embarking on the installation process. This includes a stud finder, masonry drill bit, screws, a level, and anchors suitable for stucco walls. By having everything ready, you streamline the process and reduce the chances of errors or delays.
The first step involves locating the studs in the stucco wall using a reliable stud finder. This is a critical aspect of the process, as attaching the TV mount to the studs ensures a strong and stable foundation. Once the studs are identified, mark their positions clearly to guide the subsequent steps.
Next, choose an appropriate height for your TV, keeping in mind factors such as eye level and the room’s layout. With the marked stud positions as reference points, use a level to draw horizontal lines indicating where the mount will be attached. Precision in this phase contributes significantly to the overall aesthetics and functionality of the mounted TV.
Now, it’s time to drill pilot holes into the stucco wall. Ensure that you use a masonry drill bit designed for stucco to prevent any damage. Gradually drill into the marked stud positions, maintaining a steady hand and consistent pressure. The pilot holes pave the way for the screws that will secure the TV mount to the wall.
Insert anchors into the pilot holes, providing additional support and stability for the screws. Choosing anchors suitable for stucco is crucial, as they ensure a secure grip on the wall. Carefully drive the screws through the TV mount and into the anchors, tightening them securely. It’s essential to double-check the level throughout this process to guarantee a straight and balanced mount.
With the TV mount securely attached to the stucco wall, the final step involves mounting the television onto the bracket. Enlist the help of a friend or family member to ensure a safe and straightforward installation. Carefully lift the TV and align it with the bracket, securing it in place according to the manufacturer’s instructions.
In summary, the key to a successful and efficient TV mounting on stucco walls lies in careful preparation, accurate measurements, and the use of appropriate tools and materials. By following the steps outlined in this guide, you not only save time but also ensure the safety and stability of your TV installation.
Remember, safety should always be a top priority during the process. If you encounter challenges or feel uncertain at any point, seeking professional assistance is a wise decision. With the right approach and attention to detail, you can enjoy the benefits of a seamlessly mounted TV on your stucco wall in no time.